Here are detailed step-by-step instructions for Macbook Pro keyboard users on how to take a screenshot in Windows. Today’s post is based on the opinions of our experienced Macbook Pro keyboard users:
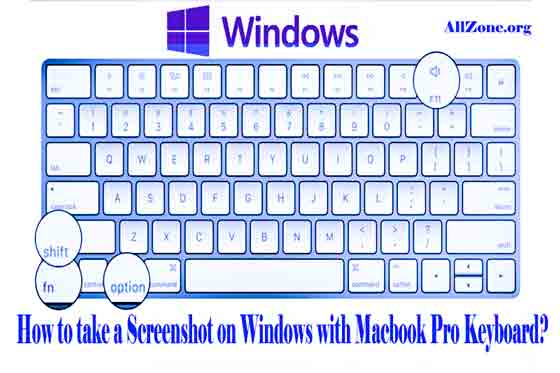
If you want to capture the whole screen at once, press the three keys “Fn” + “Shift” + “F11” at the same time. It will take a screenshot of the entire screen in front of you and automatically save it to the clipboard folder.
If you want to capture a portion of the screen, press the three keys “Fn” + “Shift” + “F11” together to activate the screenshot tool. You will see a crosshair cursor on the screen, now use the mouse to select the right place and click on the part of the screen you want to capture, and drag it to the part of the screen you want to capture. Once you release the mouse button, the screenshot will be saved to the clipboard.
If you want to use Windows’ default snipping tool, press the “Windows” key + “Shift” + “S” keys together. Now as before you will see a crosshair cursor on the screen now select the right place using the mouse and click on the part of the screen you want to capture and drag it to the part of the screen you want to capture. Once you release the mouse button, the screenshot will be saved to the clipboard.
Once you have taken the screenshot, you can paste it into an image editing program or other application using the “Ctrl” + “V” keys. You can also save the screenshot to a file by opening Paint or another image editing program, and then pressing “Ctrl” + “V” to paste the screenshot. Finally, save the image by selecting “File” and then “Save As.”
How do I take a screenshot on my PC with a Mac keyboard?
If you’re using a Mac keyboard with a PC, you can take a screenshot by following these steps:
To capture the entire screen, press the “Command” + “Shift” + “3” keys simultaneously. This will take a screenshot of your entire screen and save it to your desktop as a PNG file.
To capture a portion of the screen, press the “Command” + “Shift” + “4” keys. Now you will see the cursor as a crosshair. Click and drag over the area you want to capture, then release the mouse button to take the screenshot. The screenshot will also be saved to your desktop as a PNG file.
To capture a specific window, press the “Command” + “Shift” + “4” keys, then press the spacebar. This will change the cursor to a camera icon that looks like a camera. Move the camera over the window you want to capture, then click to take the screenshot. The screenshot will also be saved to your desktop as a PNG file.
Note: If the above methods don’t work, you can also try using third-party software like Snipping Tool or Lightshot to take screenshots on your PC with a Mac keyboard.
How do I take a screenshot on Windows like a Mac?
Taking a screenshot on a Windows computer is slightly different from taking a screenshot on a Mac, but it is still quite easy to do. Here are some ways to take a screenshot on Windows like a Mac:
Use the Snipping Tool: The Snipping Tool is a built-in utility on Windows that allows you to capture screenshots. To open the Snipping Tool, press the Windows key + Shift + S. Then arbitrarily select the area of the screen you want to capture.
Use the Windows Key + Print Screen: To take a screenshot of the entire screen, press the Windows key + Print Screen. The screenshot will be saved in your Windows Pictures folder.
Use the Windows Key + Shift + S: This keyboard shortcut allows you to take a screenshot of a specific area of the screen. Once you press the shortcut, select the area you want to capture.
Use a third-party app: If you want more advanced screenshot capabilities, you can use a third-party app like Greenshot or Lightshot.
Overall, Windows and Mac have slightly different keyboard shortcuts and built-in utilities for taking screenshots, but the functionality is quite similar.
How do you take a screenshot on Windows keyboard?
To take a screenshot on a Windows computer using the keyboard, you can use one of the following keyboard shortcuts:
PrtScn key: Press the PrtScn (Print Screen) key on your keyboard to capture a screenshot of the entire screen. The screenshot will be copied to your clipboard and you can paste it into an image editing program or document if you want.
Alt + PrtScn: Press the Alt key + PrtScn key to capture a screenshot of the active window. The screenshot will be copied to your clipboard and you can paste it into an image editing program or document if you want.
Windows key + Shift + S: Press the Windows key + Shift + S to open the Windows Snipping Tool, which allows you to capture a screenshot of a specific area on your screen. Once you press the shortcut, select the area you want to capture.
Windows key + PrtScn: Press the Windows key + PrtScn key to capture a screenshot of the entire screen. The screenshot will be saved in your Pictures folder in a subfolder called Screenshots.
Note that the keyboard shortcuts may differ depending on your Windows version and keyboard layout.
What is F11 on Macbook Pro?
The F11 key on a MacBook Pro is a function key that can be used for a variety of purposes depending on the context in which it is used. By default, pressing the F11 key on a MacBook Pro will trigger the “Show Desktop” function, which will minimize all open windows and display the desktop.
However, the behavior of the function keys on a MacBook Pro can be customized in the keyboard settings. For example, you can choose to use the function keys as standard function keys or use them as special features for controlling various system settings, such as brightness, volume, and media playback. To customize the behavior of the function keys, go to System Preferences > Keyboard, and then select the “Use F1, F2, etc. keys as standard function keys” checkbox.
FAQs And Short Answer
To take a screenshot on a PC using a Mac keyboard, you can use the “Windows + Shift + S” keyboard shortcut. This will open the Windows Snipping Tool, which allows you to capture a screenshot of a specific area on your screen. Once you press the shortcut, select the area you want to capture. The screenshot will be copied to your clipboard and you can paste it into an image editing program or document if you want.
To take a screenshot on Windows like a Mac, you can use the “Windows + Shift + S” keyboard shortcut. This will open the Windows Snipping Tool, which allows you to capture a screenshot of a specific area on your screen. Once you press the shortcut, select the area you want to capture. Alternatively, you can use the “Windows + PrtScn” keyboard shortcut to capture a screenshot of the entire screen. The screenshot will be saved in the Pictures folder in a subfolder named Screenshots.
By default, pressing the F11 key on a MacBook Pro triggers the “Show Desktop” function, which minimizes all open windows and displays the desktop.
To take a screenshot on a Windows computer using the keyboard, you can use the “PrtScn” key to capture a screenshot of the entire screen, or “Alt + PrtScn” to capture a screenshot of the active window. The screenshot will be copied to your clipboard and you can paste it into an image editing program or document if you want. Alternatively, you can use the “Windows key + Shift + S” keyboard shortcut to open the Windows Snipping Tool and capture a screenshot of a specific area on your screen.
2 thoughts on “How to take a Screenshot on Windows with Macbook Pro Keyboard”
Comments are closed.